Installing, Upgrading (and Migrating) Drupal Sites
Installing, Upgrading (and Migrating) Drupal SitesThis section contains tips on how to install Drupal from scratch, how to apply routine point release updates, and how to migrate between major version of Drupal. There is also a guide to moving sites from development (either on your local computer, or on a development server) to a production environment (e.g. OIT Web Hosting). For more generic but also more official guidance, the official Drupal website has a Guide to Migrating a Drupal Site.
Please be cautious in using any of the information provided here in conjunction with upgrading or migrating a production Drupal site: always make backups of your live production site first, so that if anything goes wrong, you can revert back to the old version of the site.
Installing Drupal
Installing DrupalThis section contains guides to help you with installing a new copy of Drupal. Information on updating and upgrading existing Drupal sites can be found elsewhere in the handbook.
Where to Host Your Drupal Site?
Where to Host Your Drupal Site?There are a number of ways you can host your Drupal site on campus, which is strongly recommended for any unit-level website.
All units can take advantage of the central OIT Web Hosting service. This service can host many popular PHP based content management systems, including Drupal and WordPress. For those looking to quickly setup a unit-level website, OIT Web Hosting supports Drupal Express, which will give you a jump start on building a Drupal based website by installing Drupal plus a number of standard add-on components, such as the official Georgia Tech website theme and page layout system.
Should you choose not to use OIT's services, some Schools, Colleges, and other units have their own externally hosted or internally housed servers for web hosting. You should consult with your local IT representatives to see what is available. You can still make use of the official Georgia Tech website theme and page layout system by installing them from their GitHub repositories.
Installing Drupal to an OIT Web Hosting Account
Installing Drupal to an OIT Web Hosting AccountThe following steps should guide you in getting a Drupal installation set up in an OIT Web Hosting account.
Should I Use Drupal on OIT Web Hosting?
Drupal 10 is now fully supported on OIT Web Hosting. However, this does not mean that it is the right choice for everyone. For smaller, simpler sites, a WordPress site on Sites @ Georgia Tech might be a good option to consider. Please see the OIT FAQ guide, Is Drupal the right choice of CMS for my site?, for further discussion of web hosting options.
Regardless, it is strongly recommended that no new sites be built on Drupal 7, as version 7 is reaching the end of its life on November 28, 2022. After that date, it will no longer receive any security support from its developers.
A Turnkey Drupal 10 Website on OIT Web Hosting
OIT is now offering an updated version of Drupal Express for Drupal 9 based websites. When requesting a new Web Hosting account, you can mark this option on the request form and your account will be pre-loaded with a ready-to-use version of Drupal 9 complete with the official Georgia Tech web theme and page layout system.
Other Options for Drupal 10
Before you Begin: If you haven't done so already, you'll need to request a hosting account from OIT. You will also need to know how to access the Plesk control panel for your account in order to complete the rest of these steps, and you may also wish to set an SSH password or SSH key so that you can SSH into your web hosting space.
If you decided to set up Drupal somewhere else to build your site, and now want to move that site to OIT Web Hosting, you should see our separate Site Migration Guide.
Installing Drupal 10 Using GitHub and Composer
If you prefer to manually install Drupal 8 with the official Georgia Tech components, there is a GT Installer script available to guide you through the process. Please also see the following OIT FAQ guides:
Installing Drupal 10 Manually From a Downloaded Archive File
Another way to install Drupal is to download the installer and copy it to your hosting account. Please note that this method is not compatible with the official Georgia Tech web theme, so it is only suitable for sites that do not need this theme (e.g. student organization sites, research project sites, etc.)
- Visit the Drupal.org website and download the latest version of the Drupal 9.x series for any site that needs to have standard Georgia Tech branding.
- Use the latest stable release of Drupal
- If your are comfortable with using SSH to connect to your Web Hosting account, you can select either download format (.tar.gz or .zip). If you prefer to upload the archive file to your Web Hosting account via the Plesk control panel, you must download the ZIP format file.
- Upload the archive file to your OIT Web Hosting Account and unpack it where you want your Drupal installation to live. From within the Plesk control panel, you can upload the archive file via the File Manager. Once the file is uploaded, just select it in the File Manager to unpack it. After the archive file has been unpacked, move it to your hosting account's "/private/" folder.
- In the Plesk control panel, go to the Databases manager and create a new database. Copy down the database name, the database user name, and the password, as you will need them later.
- Navigate to your Web Hosting site's URL and you should get an installation screen for Drupal. Follow the prompts and answer the questions - they should mostly be straightforward. Refer to the Drupal Installation Guide if you need any help.
Installing Drupal on Your Own Computer
Installing Drupal on Your Own ComputerPurpose
A development copy of Drupal on your local computer lets you design and build a site with a few fewer hassles. It is an excellent place to do testing and code development, but does not support collaboration very well. For collaborating with stakeholders, you may want to have both a development site on your local computer and a test site on a regular internet connected web hosting solution (e.g. OIT Web Hosting or a departmentally run server).
Potential Uses
- Testing new patches or major upgrades.
- Testing out new themes or modules.
- Module or theme development.
- Stress-testing a site.
- Getting familiar with Drupal.
Expert Local Development Guides
How to Set Up a Mac OS X / macOS System for Local Development
How to Set Up a Mac OS X / macOS System for Local DevelopmentThis process allows you to set up your Mac as a faux-server for local development.
- Download Xcode from the App Store: https://developer.apple.com/xcode/
- Install command line tools: http://osxdaily.com/2014/02/12/install-command-line-tools-mac-os-x/
- Install and configure wget: http://coolestguidesontheplanet.com/install-and-configure-wget-on-os-x/
Do note that Drupal 8 requires PHP 7, and only MacOS 10.14+ (Mojave or later) come with PHP 7 – all earlier versions have some form of PHP 5. If you are running and older version of MacOS, you can either use HomeBrew to try to upgrade PHP, or look at one of the options to install a virtual development environment on your local computer.
How to Use Lando as a Drupal Development Environment
How to Use Lando as a Drupal Development EnvironmentWhat is Lando? From the Lando documentation:
It's a free, open source, cross-platform, local development environment and DevOps tool built on Docker container technology and developed by Tandem. Designed to work with most major languages, frameworks and services, Lando provides an easy way for developers of all skill levels to specify simple or complex requirements for their projects, and then quickly get to work on them.
In simpler terms, it is a container system built on Docker that runs on Windows, MacOS, and Linux, letting you spin up development websites with a minimum technical hassles. It is just one of many ways to easily set up a Drupal 10 development site for either building a complete new website, doing module development work, or testing third-party modules in a safe "sandbox" environment.
Enabling a Mail Server in Lando
Enabling a Mail Server in LandoThe Lando Drupal 7 recipe does not come with mail functionality out-of-the-box. However, DrupalEasy has written straight-forward documentation on how to enable server mail functionality.
This is helpful for enabling mail notifications for password resets, trigger/Rules configuration.
Process
- Add the following configuration to your
.lando.ymlrecipe:proxy: mailhog: - mail.lemp.lndo.site services: mailhog: type: mailhog hogfrom: - appserver -
Edit
mail.lemp.lndo.siteto better match, mirror, or apply to your local Lando website. -
Run "
lando rebuild". Caution should be used when using using the 'rebuild' command, as while most services retain their data during a rebuild, some may not. -
Running "
lando start" will now initialize a Mailhog server, which will siphon all Drupal-generated mail into that inbox.
Lando and Mercury Reader
Lando and Mercury ReaderMercury Reader requires an extra php extension outside of what lando's drupal10 recipe typically provides.
Process
Adjust your lando.yml Landofile to include the following:
services:
  appserver:
    build_as_root:
      - apt-get update -y
      - apt-get install libxslt1-dev -y
      - docker-php-ext-install xsl
      - docker-php-ext-enable xsl
Rebuild your lando environment to install the libraries:
lando rebuild -y
Set up lando on Windows 10 for an easy local development environment
Set up lando on Windows 10 for an easy local development environment- First install WSL version 2. You do not need VSCode or Hyper-V and may not even need to install a specific version of Ubuntu (20.04 at the time of writing), as it usually defaults to the latest version.
- Next, install Docker Desktop for Windows (on Windows, NOT within the Ubuntu VM).
- Then, install lando's .exe from github (on Windows, NOT within the Ubuntu VM).
Starting a Drupal 10 Website with Lando
Starting a Drupal 10 Website with LandoThe below scenario assumes you have Lando installed on your own machine for local development.
Kickstarting a Drupal 9 website
Install Drupal via composer:
composer create-project drupal-composer/drupal-project:10.x-dev SITENAME --no-interactionEnter SITENAME and init lando.
cd SITENAME
lando init
During the lando init process:
- Select the appropriate recipe (drupal9) for lando.
- Provide the webroot directory (web).
- Provide a shortcut name for the lando app (your choice and preference).
Once completed, now start up your virtual environment with:
lando startLando will kickstart the virtual filesystems in your specified root directory and initialize a locally-hosted database and web server (using Docker).
When you see BOOMSHAKALAKA!, Lando has configured all the environment configurations and is ready to party.
Using Drupal 10 with Lando
Using Drupal 10 with LandoDrupal Console, Drush and Lando
Lando provides scaffolding for tools like Drupal Console and Drush.
To use these tools within Lando, just pre-empt your command with lando to make sure it's running within the Lando interface.
For example, to install a new module in Drupal 8 using Drupal Console, use:
lando drupal moi module_name
Or, to clear all caches using Drupal Console, use:
lando drupal cc all
Please see the Lando Drupal 8 documentation for a full list of tools.
Example .lando.yml files for different environments
Example .lando.yml files for different environmentsHere are some example .lando.yml files (and associated settings.php files for drupal) of commonly-used configurations.
Drupal 7: Single site
Database code in settings.php
$databases = array (
  'default' =>
  array (
    'default' =>
    array (
      'database' => 'myd7sitedb',
      'username' => 'database',
      'password' => 'database',
      'host' => 'database',
      'port' => '3306',
      'driver' => 'mysql',
      'prefix' => '',
    ),
  ),
);
.lando.yml Code
name: myd7site
recipe: drupal7
config:
  php: '7.3'
  composer_version: 2
  via: 'apache:2.4'
  webroot: .
  database: 'mysql:5.7'
  # note this is just for lando/docker as 'global' install--drush is installed via drupal composer for local site use
  drush: ^8
  xdebug: false
services:
  database:
    creds:
      user: database
      password: database
      database: myd7sitedb
  appserver:
    overrides:
      environment:
        DRUSH_OPTIONS_URI: "https://local.myd7site.gatech.edu"
tooling:
  'lint:php:themes':
    service: appserver
    cmd: /app/vendor/bin/phpcs --standard=phpcs-themes.xml
    description: 'Runs php linter against your custom code. Ex: lando lint:php'
proxy:
  appserver:
    - myd7site.lndo.site
    - local.myd7site.gatech.edu //set in local hosts file
Drupal 7: Multi site
Database code in settings.php
$databases = array (
  'default' =>
    array (
      'default' =>
        array (
          'database' => 'database',
          'username' => 'mysql',
          'password' => 'mysql',
          'host' => 'ic',
          'port' => '3306',
          'driver' => 'mysql',
          'prefix' => '',
        ),
    ),
);
.lando.yml Code
name: multid7
recipe: drupal7
config:
  php: '7.3'
  composer_version: 2
  via: 'apache:2.4'
  webroot: .
  database: 'mysql:5.7'
  # note this is just for lando/docker as 'global' install--drush is installed via drupal composer for local site use
  drush: ^8
  xdebug: false
proxy:
  appserver:
    - cse.lndo.site
    - local.cse.gatech.edu //set in local hosts file
    - ic.lndo.site
    - local.ic.gatech.edu //set in local hosts file
    - scs.lndo.site
    - local.scs.gatech.edu //set in local hosts file
services:
  cse:
    type: mysql:5.7
    appserver:
      overrides:
        environment:
          DRUSH_OPTIONS_URI: "https://local.cse.gatech.edu"
  ic:
    type: mysql:5.7
    appserver:
      overrides:
        environment:
          DRUSH_OPTIONS_URI: "https://local.ic.gatech.edu"
  scs:
    type: mysql:5.7
    appserver:
      overrides:
        environment:
          DRUSH_OPTIONS_URI: "https://local.scs.gatech.edu"
Drupal 9: Single site
Database code in settings.php
$databases['default']['default'] = array (
  'database' => 'myd9db',
  'username' => 'database',
  'password' => 'database',
  'prefix' => '',
  'host' => 'database',
  'port' => '3306',
  'namespace' => 'Drupal\\Core\\Database\\Driver\\mysql',
  'driver' => 'mysql',
);
.lando.yml Code
name: myd9
recipe: drupal9
config:
  php: '7.3'
  composer_version: 2
  via: 'apache:2.4'
  webroot: .
  database: 'mysql:5.7'
  drush: true
  xdebug: false
tooling:
  'lint:php:themes':
    service: appserver
    cmd: /app/vendor/bin/phpcs --standard=phpcs-themes.xml
    description: 'Runs php linter against your custom code. Ex: lando lint:php'
  drush:
    service: appserver
    env:
     DRUSH_OPTIONS_URI: "https://local.myd9.gatech.edu"
proxy:
  appserver:
    - myd9.lndo.site
    - local.myd9.gatech.edu // set in local hosts file
services:
  database:
    creds:
      user: database
      password: database
      database: myd9db
Symfony 4
.lando.yml Code
name: samplesymfony4app
recipe: symfony
config:
  symfony: '4'
  php: '7.3'
  via: 'apache:2.4'
  webroot: public
  database: mysql:5.7
  services:
    database:
        creds:
            user: database
            password: database
            database: gradcc
Symfony 5
.lando.yml Code
name: samplesymfony5app
recipe: symfony
config:
  php: '7.3'
  via: 'apache:2.4'
  webroot: public
  database: mysql:5.7
  services:
    database:
        creds:
            user: database
            password: database
            database: symfony5db
Simple LAMP stack for PHP
.lando.yml Code
name: myphp
recipe: lamp
config:
  php: '7.4'
  via: 'apache:2.4'
  composer_version: '2'
  webroot: public
  database: mysql:5.7
  services:
    database:
        creds:
            user: database
            password: database
            database: myphpdb
  proxy:
    appserver:
      - myphp.lndo.site
      - local.myphp.gatech.edu // set in local hosts file
File or Directory Permissions Errors
File or Directory Permissions ErrorsGeneral Permissions Errors
Note: If you are running in a shared hosting environment, like OIT Web Hosting, then you are not likely to get many if any general permission errors, as each website runs under its own hosting account in these environments. Thus, it is nearly impossible to mess up file and directory ownership in these environments. However, it is worth checking the file and directory permissions, as they are often changeable, and if the owner-write permission is removed from a file or directory then the web server will not be able to modify that file or directory.
If you see any kind of general file or directory permissions errors, the first thing to check is that your sites "sites/default/files" directory and all of its subdirectories are writable by account that your web server runs under. On stand-alone web servers, these directories and their files don't necessarily have to be owned by this account, but the account still has to have permission to access them. Consult with your server administrator if you need help in determining the right user and group ownerships for your website's files and directories.
Temporary Directory Permissions Errors
Sometimes after moving a Drupal site to a new web server, you may see an error message that looks something like this:
The specified file temporary://fileX could not be copied,
because the destination directory is not properly configured.
This may be caused by a problem with file or directory permissions.
More information is available in the system log.
Often this is accompanied by the site looking strange and not having much theming or design. This happens because your site's file system needs permissions to access the Temporary directory. Usually this directory is located at "/tmp", but sometimes the person who built the Drupal site configured it to use a special directory, and then when you copied the site to the new web server, either that special directory was not created or its permissions were not set correctly.
To fix this, try to log into the site as an administrative user and then navigate to the Media section of the Configuration administration page, and go into the File system sub-section. If you have trouble navigating through the site, you might try going directly to that page:
http://your-site-host-name/admin/config/media/file-system
On the File system page, make a note of the path set for Temporary directory and then check to make sure it exists on your server and that it is writable by the account that your web server runs under. Alternatively, you may want to just change the value of Temporary directory to "/tmp" and see if that works. For websites on OIT Web Hosting, the path "/tmp" should always work, and it's a good starting point for many other web servers out there as well. If you still run into problems then you may need to contact your server administrator to find out what temporary directory path you should use with Drupal for that server.
Installing Drupal 10 Using the GT Installer Script
Installing Drupal 10 Using the GT Installer ScriptFor most general use cases, we recommend the OIT Web Hosting turnkey install option of Drupal 10: when requesting a new Web Hosting account, you can mark the Drupal Express option on the request form and your account will be pre-loaded with a ready-to-use version of Drupal 10 complete with the official Georgia Tech web theme and page layout system.
Some users may wish to manually set up Drupal 10 with Georgia Tech components. A Drupal 10 GT Installer script is available to install Drupal Core, the GT Theme, the GT Tools module, and the Curie profile.
NOTE: If you want to have the Georgia Tech theme blocks for Layout Builder in your site, you should install the site either through the GT Installer script or the turnkey option mentioned above. While not impossible, it is difficult to properly install these components into an already existing Drupal 10 website.
Pre-Installation Note
- Download the installer script to a directory outside of the project path. Otherwise, you will receive a “$PROJECTPATH is not empty” error.
- If you have receive a memory limit error, you can set the composer memory limit with the following command:
export COMPOSER_MEMORY_LIMIT=-1
Installation process
- Download and unzip the gt_installer project.
- At the command line, navigate to the gt_installer directory.
- Make sure the file 'install.sh' is executable.
- Run ./install.sh and follow the prompts:
$ ./install.sh

Enter the full path to your project directory: /c/path/to/your/installation-folder

Enter your database username: database_username

Enter your database password: database_password

Enter your database host (probably localhost): localhost

Enter the database port: 3306

Enter the name of the database: database_name

Enter the site name: Site Name

Enter the site email: email@gatech.edu
Attribution
Instructions courtesy of Veronique Topping.
Moving an Existing Drupal Site to OIT Web Hosting
Moving an Existing Drupal Site to OIT Web HostingMoving an existing Drupal site (either a production site or one built on a development server) to an OIT Web Hosting account is not terribly difficult, but it is important to make sure you follow all of the right steps.
Skills Required for Migrating a Drupal Site
- You will need to know how to access the Plesk control panel for your account in order to complete the rest of these steps you may also wish to set an SSH password or SSH key so that you can SSH into your web hosting space.
- You should have a basic understanding of filesystems and mySQL databases, as well as phpMyAdmin
- If you need assistance with some of these steps, check with your local unit's IT support staff
Before You Begin
If you haven't done so already, you'll need to request a hosting account from OIT. If you are moving a live site, you should ask for the account to be set up as the hostname of your live site, but ask that DNS not be updated yet, since that would disrupt your existing site. Once the account is set up, you can do one of two things to access it while you are working on migrating your existing site:
- You can edit your local computer's hosts list (on Linux and Macintosh computers, this is /etc/hosts) to locally map your live site's hostname to your OIT hosting account. This is the quickest method, but while you have this mapping in place you won't be able access your existing live site from that computer.
- You can create a DNS alias for your new site. You or someone in your IT staff will have to create the alias in DNS, and then you'll have to go into the Plesk control panel for your new OIT Web Hosting site and add the alias there (via the Add New Domain Alias button on the main page) so that the Plesk server knows that your DNS alias goes with your OIT Web Hosting account. This method takes a little more effort to set up, but with it you can access your new site from anywhere while you are testing it, and you can access your existing live site from the same computer at the same time.
- You could actually mix these two methods for perhaps the most versatile option: you can define an alias for your new site in your local computer's host file, and then add that alias to your Web Hosting account via the Plesk control panel, but without adding the alias to DNS. This will let you access both the old and new sites from your local computer, but you still won't be able to access your new site from anywhere else.
When your new site is ready to go live and replace your existing live site, you can have DNS updated (see below) and remove any unneeded aliases that you have created.
Moving Any Drupal Site to an OIT Web Hosting Account
- You will need to create an archive of the filesystem of your existing site, and an archive (often called an SQL dump) of your existing site's database. How you do this will depend on where your existing site is located. Please note that if you are comfortable with using SSH, you can archive your site's filesystem as either a GZipped Tar archive (.tar.gz extension) or a Windows style ZIP archive (.zip extension). If you are not comofrtable with SSH and prefer to upload your archive to your Web Hosting account via the Plesk control panel, your archive must be in Windows style ZIP format.
- Upload the archive file to your OIT Web Hosting Account and unpack it where you want your Drupal installation to live. From within the Plesk control panel, you can upload the archive file via the File Manager. Once the file is uploaded, just select it in the File Manager to unpack it. After the archive file has been unpacked, move it to your hosting account's "/private/" folder.
- In the Plesk control panel, go to the Databases manager and create a new database. Copy down the database name, the database user name, and the password, as you will need them later.
- While still in the Databases manager, on its main page select the phpMyAdmin link for the database you just created. This will open phpMyAdmin for this database in a new browser window or tab. On the Import tab of phpMyAdmin, import the SQL dump of your existing site's database.
- Either via SSH or the Plesk control panel's File Manager, modify your Drupal site's sites/default/settings.php file and update the database information in it to match what you copied down in step three above.
- Navigate to your Web Hosting account's main URL, and you should hopefully see the front page of your Drupal site. Try logging into it and check the Drupal status page and error logs to see if there are any problems with the site.
Updating DNS When Moving a Live Site
If your site is already live in another location, then you will need to update DNS to point your site's hostname to your new OIT Web Hosting account. You will need to know your hosting account's server name - to get this, just look in your browser's address bar while logged into your Web Hosting account's Plesk control panel. The server will be web-plesk##.oit.gatech.edu, where # is a number. Either update your existing site's hostname to point to this Plesk server, or if you don't have that kind of access, ask your local IT support staff to make the change for you. If you don't have anyone in your unit who can update DNS, you can always open a support request with OIT.
A Word on Migrating a Development Site to Live Production
If you are developing your site somewhere else and then moving it to an OIT Web Hosting account (or any other server where the DNS hostname for the site will be different from what it was in development), then you need to take special care to make sure that your internal links do not break.
When setting the URL paths for page links, inline images, attachment files, etc., make sure to enter those URLs as relative paths. A regular (called 'absolute') URL looks like this:
http://your-site-host-name/path/to/my/file.xyz
The relative version of that path looks like this:
/path/to/my/file.xyz
Relative paths will continue to work even after you change the hostname of the website. Absolute paths will cause the user's web browser to try to follow the link back to the development site. This can cause all kinds of problems, ranging from links not working and images not showing as soon as the new site goes live, to problems that aren't detected until someone shuts down the development site months after the production site went live.
The command line savvy developer may want to search through his/her SQL database dump for the hostname of the development server before uploading that dump file to the new OIT Web Hosting account. This is a great way of catching any absolute URL links that are still lingering about somewhere in the site.
Importing a Migrated Site into Installatron
Installatron is a service available in OIT Web Hosting that (among other things) can keep the core of your Drupal site automatically updated with security patches. To import a migrated Drupal site into Installatron, please refer to the Installatron documentation provided by OIT's Web Hosting team and watch the video tutorial on this page.
Please note that by default, Installatron does not enable automatic updating of Drupal core when importing a Drupal website into Installatron. To turn on automatic update:
- From the front page of the Plesk control panel, look for the Installatron Applications Installer link on the right-hand side of the page.
- In the section that gives details about your Drupal installation, select the blue wrench icon button.
- Under Automatic Update, select 'Create a backup and update to new minor versions and security releases. (Recommended)'.
- Select Save All.
Best Practices for Configuring and Managing Drupal
Best Practices for Configuring and Managing DrupalBefore you take a Georgia Tech Drupal site live, it is a good idea to go through the following checklist of best practices to make sure your site is secure and streamlined for production use. This checklist is designed for Drupal 7 sites on OIT's Web Hosting, but will generally apply to other environments and later versions of Drupal as well.
Within the Drupal Application
Helpful Tip: The admin interface can be accessed via the black admin toolbar at the top of any page when logged in with administrator rights.
Make Sure Core, Module, and Theme Updates Get Applied When Needed
Enable the Update manager using the following settings so that you and your team will be notified of important available updates. Then, make sure those updates get applied in a timely fashion (but be sure to back up your site before doing so: more information on backup is below, in case anything goes wrong).
If you are using Drupal 8 or higher (considered modern Drupal), the site now needs the Composer CLI tool to manage installation and updates for Drupal core and any modules, due to more complex project dependencies.
Recommended "Available updates" Settings
Located at: Reports -> Available Updates -> Settings (admin/reports/updates/settings)
- Check for updates: Weekly
- Check for updates of disabled modules and themes: Yes (unless on a multi-site, where only 1 site should check this)
- E-mail addresses to notify when updates are available: At least TWO (2) email addresses (preferably some office-wide emails).
- E-mail notification threshold: Only security updates
Limit Access to Your Site
Avoid giving out any more access than necessary
- Make sure you have a suitable user account role for content managers that does not let them install modules, change themes, adjust low-level Drupal settings, etc.
- Ideally, only trained IT and/or web development staff should have administrator or super administrator privileges
Review your User Account List Regularly
Remove (or block) accounts of users no longer working in your unit; blocking is often the better option, as that maintains tracking of what those users did. Removing the account will require all content changes to be attributed to the "anonymous" user.
Review your Role Permissions Regularly
Roles are what map Drupal access permissions to individual users. Review the list (found at People -> Permissions) to make sure roles do not have unnecessary permissions that put your site at risk.
Recommended "Account settings" Settings
Located at: Configuration -> People -> Account settings (admin/config/people/accounts)
- Anonymous users - Name: Visitor
- Administrator role: Super Administrator (for Drupal Express sites only; for all other sites: Administrator)
- Who can register accounts?: Administrators only
- Require e-mail verification when a visitor creates an account: Yes.
- When cancelling a user account: Disable the account and keep its content.
- Personalization
- Enable signatures: No
- Enable user pictures: No
Enable GT Account Authentication
- Most Georgia Tech Sites should use GT Account Authentication, which is provided by the CAS (cas) module
- Drupal Express has the CAS module already installed
- For all other sites, see the Installing CAS section for installation and configuration instructions
Recommended "Text formats" Settings
Located at: Configuration -> Content authoring -> Text formats (admin/config/content/formats)
- Order matters: place "basic text editor" at the top/first, then "minimal HTML", etc.
- "Plain text" is the only format to which Anonymous users should have access.
- If "PHP code" is present, DO NOT allow anyone to use it!
Configure Error Logging Securely
Drupal and PHP error messages shown to regular users could reveal sensitive details about your site, and just look unprofessional as well. Use the following settings to hide error and warning messages from site visitors and keep them from overflowing your site's database.
Note: Do not enable the core syslog module if you are using OIT Web Hosting. According to the syslog module documentation, it is not appropriate for shared hosting. You should be able to find most useful debugging information by going to the Logs section in the OIT Web Hosting Control Panel and looking at the error logs.
Recommended "Logging and errors" Settings
Located at: Configuration -> Development -> Logging and errors (admin/config/development/logging)
- Error messages to display: None.
- Database log messages to keep: 100
Enable Caching to Improve Site Performance
Recommended "Performance " Settings
Located at: Configuration -> Development -> Performance (admin/config/development/performance)
- Caching
- Cache pages for anonymous users: Yes.
- Cache blocks: (Depends on how often your blocks change)
- Minimum cache lifetime: (Depends on how much dynamic content you have)
- Expiration of cached pages: (Only matters if you are using an external cache like Varnish)
- Bandwidth optimization
- Aggregate and compress CSS files: Yes
- Aggregate JavaScript files: Yes
Protect Web Forms and Collected Data
Note: You should try using non-Drupal solutions for forms, such as Qualtrics, whenever possible. Keeping forms and general data out of Drupal is more secure and makes it easier to manage and later upgrade your Drupal site.
In general, do not use Drupal to store sensitive data of any kind: FERPA protected, HIPAA protected, DoD protected, or personal identity information (SSNs, birthdates, etc.)! The exception to this rule is if your Drupal site is for internal use only and is firewalled properly to prevent access from off-campus. Even then, you should apply all possible security protections to prevent internal hacking of your sensitive data.
If you still need to have a form on a Drupal site, use the latest version of WebForm, and install some type of anti-spam / anti-bot protection, as forms get hit by bots quickly and regularly once they are made public.
- Look at modules like Honeypot, Spamicide and BOTCHA to fend off bots
- Avoid CAPTCHA (especially the early versions) if at all possible, as it will greatly irritate your users; the latest version is more acceptable, as it does not "quiz" the site visitor as strongly as the earlier versions
- If you're resorting to CAPTCHA, consider whether or not the form can instead be locked down to just the Georgia Tech Campus only
Recommended "Site information" Settings
Located at: Configuration -> System -> Site information
"E-mail address" is the address from which emails are sent by the site, so it should be generic, rather than the address of a real person. Note: this must be an @gatech.edu email address for the campus email servers to accept messages from your website!
Note that the Georgia Tech web theme does not display the "Site name" set here, but rather has it's own site title fields on the theme configuration page. However, "Site name" is used for the name shown in a web browser tab and any page bookmarks in a browser, so it needs to be set to something meaningful, and ideally identical to what you set on the theme configuration page.
Module and Library Safety Tips
- Where possible, sign up for alerts about updates to libraries being used (such as CKEditor, phpCAS, Flexslider, etc), especially security vulnerability alerts. Drupal does not give any notifications about out-of-date libraries!
- Always turn off the following (unless you really need them):
- PHP filter
- Tracker
- Comments
- Review your modules regularly and disable any that are not being used
- Disabled modules should be uninstalled and then removed from the Drupal filesystem (move them to the
/privatefolder if you are on OIT Web Hosting) - If Drupal reports that a module has been removed from its repository on the Drupal.org website, there's usually a good reason. Remove any such modules from your site ASAP!
- Disabled modules should be uninstalled and then removed from the Drupal filesystem (move them to the
- Avoid keeping development-only modules on live sites. If you really need any, keep them turned off when not in use.
- Avoid alpha/beta release modules and anything that is poorly supported or not supported at all.
- When evaluating new modules, look at the last date of a release (be wary if more than a year ago), number of sites reporting usage of the module, reputation of the module's maintainer(s), and the number of open issues in the development queue.
Check Your Site's Health
- Check the Status report (found at Reports -> Status report) and correct any problems listed
- Use the Security Review module to scan your installation for common security problems
Custom Code and the Drupal Filesystem
General Rules of Thumb
- Always write secure code!
- Never hack the core Drupal code or any third party modules!
- Hacks will likely get overwritten when updates are applied later on.
- Instead, look for ways to extend or adjust the code through a custom module.
- Avoid using unsupported modules, libraries or themes.
- Test anything new or uncertain in a separate instance of Drupal. Never develop on your live site!
- Don't bother trying to hide the fact that you're running Drupal - it's really not worth the time and effort.
Drupal Filesystem Maintenance
- Avoid putting anything but Drupal related code in or under the main Drupal directory
- Adding other files or applications complicates the upgrade process, which can result in those other files or applications disappearing unexpectedly.
- Drupal version 8 and beyond does not support running any other applications from within or under the main Drupal directory.
- If you manually install modules or themes, don't leave their archive files within the Drupal directory tree. Move them to the
/privatedirectory if you want to keep them around.
- Adding other files or applications complicates the upgrade process, which can result in those other files or applications disappearing unexpectedly.
OIT Plesk Web Hosting Control Panel
General Hosting Account Configuration
Owner/Administrator
- Avoid giving out hosting account access unless it is absolutely needed; only those who need to perform Drupal code upgrades should have hosting account access - content managers should never be given access to the hosting account.
- Regularly check that the administrators of a site are correct (and remove any former maintainers).
Notification Email Address for Website
Only one email address is allowed, so set to the address of a mailing list or alias that forwards to all of your site administrators.
Installatron Applications Installer
- If you are using Drupal 8 or higher (considered modern Drupal), the site now needs the Composer CLI tool to manage installation and updates for Drupal core and any modules, due to more complex project dependencies.
The Installatron tool on Plesk does not support Composer-managed updates, and is not recommended for managing a modern Drupal site. Installatron will update Drupal core without checking dependencies, and there is a high risk of updates eventually breaking any site that includes additional modules, as most Drupal sites do.
Plesk now offers the PHP Composer UI tool to provide limited Composer support via a site's control panel. However, updates have to be manually prompted, and the tool is limited use.
- How do I get started with Drupal on Plesk?
- Is Drupal the right choice of CMS for my site?
PHP Composer UI Tool
- While it's strongly recommended to use Composer CLI to develop and manage your site projects locally, the PHP Composer tool on Plesk provides some helpful options for managing Composer applications from your site control panel.
- How do I use the Plesk PHP Composer extension?
SSL Configuration
Follow the guide to SSL configuration to run your site with SSL encryption (via an https:// URL).
Plesk Backup / Restoration Manager
- Before any major update or smaller update, it is recommended that you create a full backup of your site following the instructions before performing any changes/upgrade on your site.
- In case that you need to restore the site back from unsuccessful change/upgrade:
Please note that Drupal upgrade process tends to add new files to the system.
Restoring from backup will not delete files that were added after the backup was created. Therefore, it is suggested to do a "clean" restore to avoid new files created during the unsuccessful upgrade interfering the configuration of your site before the backup.
How to do a "clean" restore with Plesk Backup Manager (under About Restoration Behavior section)
Scheduled Tasks (cron)
- Follow the guide to setting up cron so that your Drupal site will refresh content and check for security updates.
Directory structure (multi-site vs. solo site, single system per virtual host, etc.)
- This will vary depending on your site setup, but we no longer recommend using "contrib" and "custom" subfolders in the sites/all/modules folder.
URL Redirects
- These are usually created in your
.htaccessfile (always keep a copy of the latest in your/privatedirectory). - Check that your redirects did not get overwritten when your site's Core code was late updated.
Additional ideas can be found in the following:
- Securing Your Drupal Site (Last updated in 2016)
- List of security-related contrib modules (Last updated in 2016)
- Supporting Drupal Over the Long Run (BadCamp 2012)
- Performance for Site Builders (2012)
Updating Drupal
Updating DrupalUpdates patch Drupal to add new features and protect against discovered vulnerabilities, keeping your sites working optimally. Always test new updates on a development site before applying them to your live, production site.
Drupal 9 has a different method of doing updates. Please see the soon-to-be-added pages for Drupal 9 update instructions.
Drupal Updates Sub-Topics
Configuring the Drupal Update Manager
Configuring the Drupal Update ManagerThe Update Manager, if used properly, can provide you an easily-accessible location to view what modules and themes need updating.
The settings for the Update Manager ( admin/reports/updates/settings ) provide a few key settings:
- E-mail addresses to notify when updates are available - A list of emails to be notified when Drupal finds a new release of a module.
- Check for updates of disabled modules and themes - To ensure all modules are kept up to date, this should be checked (on multi-sites, you only need to check disabled modules and themes for ONE of the multisites).
Updating Drupal 7 Core Via Installatron
Updating Drupal 7 Core Via InstallatronBefore You Begin
- To be able to use this method of upgrading, your Drupal site must have been created via Installatron or imported into Installatron.
- Please note that if you installed the Drupal application via Installatron with the update automatically setting, you will not need to go through these steps, as Installat ron will update the site as soon as the new release is posted.
- Important!!! Installatron will overwrite your .htaccess and robots.txt files. If you have made any changes to them, be sure to back the m up before upgrading so that you can restore your custom changes after the upgrade is done.
- Be sure that your Drupal website is configured in Installatron.
Upgrade Process
- Open a web browser and navigate to OIT Web Hosting [https://hosting.gatech.edu/]
- Log in using your GT Account Username and password, and then select the appropriate site from the list.
- From the left-hand menu, select Installatron Applications Installer.
- An entry describing your Drupal site should appear. Select the Upgrade button.
- Installatron will guide you through the upgrade process of the site.
- Follow the directions on the page and select Upgrade to complete the process.
Drupal 7 Installatron Updating Tips
Drupal 7 Installatron Updating TipsRunning updates on OIT Web Hosting is essential to ensuring that your site remains safe and responsive to every user. The preferred method of running updates is through Installatron, a server application which manages installed web applications on a hosting account.
Update Check
By default, Installatron will check for core updates in one of two ways:
- For new Installatron Drupal websites, Installatron checks every 6 hours for Drupal security updates.
- For imported Installatron Drupal websites, Installatron does not check for Drupal core updates.
Installatron keeps track of each site's app separately, so there is not a way to determine exactly when an update is going to apply for a site. The documentation for Installation say that a site's web app will update between 12am and 6am server time.
Similarly, when Installatron checks for web app updates from the mothership, it's independent (e.g., the updates do not happen at 12 pm, 6 pm, 12 am, 6 am). This makes sense since the increased load of websites all applying updates concurrently would heavily degrade the hosting service.
Configuring Installatron Updates
To configure your Drupal site on Installatron to automatically update, follow the directions below:
- Log in to your website from OIT Web Hosting.
- Select Installatron Applications Installer.
- For the Drupal site in question, select the wrench to view/edit details.
- Under Automatic Update, select "Create a backup and update to new minor versions and security releases. (Recommended)".
- Select Save All.
Updating from Installatron
Please see Updating Drupal Core (Installatron).
False Flag on Latest Version
As Doug Curtis from OIT Web Hosting notes, there is a current bug in detecting the latest release of Drupal from within Installatron.
- There is an open issue where Installatron shows a green check mark indicating it has the latest version but if you check the version number next to the check mark, it is not [current]. I have a ticket open with the vendor about this. This is a good reminder that you should always manually check your versions and not rely 100% on automatic systems.
Backup Directory
The default backup directory for Installatron is:
- /application-backups
You can set custom backup locations through Installatron by editing your Drupal installation via the Applications Installer, and looking under "Default Backup Location".
Updating Drupal 7 Core Manually
Updating Drupal 7 Core ManuallyBefore You Begin
-
The instructions below are for moving between different releases of the same major version of Drupal (e.g. 7.x, 8.x. etc.) Please see our Site Migrations section for more details on moving to the next major version of Drupal, which is a much more involved process.
-
If you are managing a Drupal 8 or later site via Composer, you do not want to use the following instructions, as all updates will be handled through composer.
-
The instructions below assume your site is on a UNIX style web server and regularly reference the OIT Web Hosting environment. If your site is hosted on a different kind of web server, then these instructions may have to be modified to work correctly for you.
- Additional information can be found on the Drupal.org page about minor version updates.
Drupal Core Upgrade Process
- Open up a web browser and navigate to your Drupal site.
- Log into the site as an Administrator.
- Navigate to the Maintenance subsection of the Development section of your site's Configuration administration area (Configuration -> Development -> Maintenance) and enable the "Put site into maintenance mode" checkbox. (Don't forget to save your change!)
- Either via SSH/SFTP or (for sites on OIT Web Hosting) the Plesk Control Panel, make a backup of your site's filesystem.
- If you are using SSH, you can navigate to your site's base directory and issue the following command:
-
tar czf ~/drupalbackup.tgz *
-
- If you are on OIT Web Hosting, you should store your backup in the "private" folder like so:
-
tar czf ~/private/drupalbackup.tgz *
-
- If you are using SSH, you can navigate to your site's base directory and issue the following command:
- Backup your MySQL database. On OIT Web Hosting, the easiest way to do this is to log into the Plesk Control Panel for you site and access phpMyAdmin via the Webadmin link in the Databases management section. On the other hand, if you are on a stand-alone web server where you have direct access to mySQL commands, you can run a command like the following (be sure to insert the correct username, password, and database name for your particular website):
-
mysqldump -u USERNAME -p DATABASENAME > ~/backups/database-backup.sql
-
- Rename the directory containing your Drupal installation or move the contents of the directory to another location. With many shared hosting services, you won't be able to rename this directory, so your only choice will be to move its contents. When moving the contents, be sure to get the .htaccess file from this directory so that you'll have it for reference later on.
- If you were able to rename the directory containing your Drupal installation, then from that same parent directory, download and unpack the latest version of Drupal core (be sure to replace 'x' and 'y' with the right major and minor version numbers) and rename the new drupal-x.y directory to match the orignal name of your Drupal installation directory.
-
wget https://drupal.org/files/projects/drupal-x.y.tar.gz
-
tar -xzvf drupal-x.y.tar.gz
-
mv drupal-x.y orignalDirectoryName
-
- If you had to move the contents of your Drupal directory somewhere else, then make sure you are in that now empty directory and do the following:
-
wget https://drupal.org/files/projects/drupal-x.y.tar.gz
-
tar -xzvf drupal-x.y.tar.gz
-
mv drupal-x.y/* drupal-x.y/.???* .
-
rmdir drupal-x.y
-
- Move the following folders to your old Drupal directory to your new Drupal directory:
-
sites/
-
- Return to your web browser and navigate to https://yourSiteHostName/update.php. Follow the prompts to apply any database table updates that are needed.
- Check the administrative Status report to verify that everything is working as expected.
- Navigate to the Maintenance subsection of the Development section of your site's Configuration administration area (Configuration -> Development -> Maintenance) and disable the "Put site into maintenance mode" checkbox. (Don't forget to save your change!)
Updating Drupal 7 Modules
Updating Drupal 7 ModulesBefore You Begin
-
Installatron does not upgrade modules, so even if you use Installatron to manage your Drupal core upgrades, module updates must still be done manually.
-
If you are managing a Drupal 8 or later site via Composer, you do not want to use the following instructions, as all updates will be handled through composer.
-
The instructions below assume your site is on a UNIX style web server and regularly reference the OIT Web Hosting environment. If your site is hosted on a different kind of web server, then these instructions may have to be modified to work correctly for you.
- Additional information can be found on the Drupal.org page about module updates.
Drupal Module Update Process
- Open up a web browser and navigate to your Drupal site.
- Login to the site as an Administrator.
- Put the site into maintenance mode (Configuration -> Development -> Maintenance) by enabling the "Put site into maintenance mode" checkbox and saving the configuration.
- Either via SSH/SFTP or (for sites on OIT Web Hosting) the Plesk Control Panel, make a backup of your site's filesystem.
- If you are using SSH, you can navigate to your site's base directory and issue the following command:
-
tar czf ~/drupalbackup.tgz *
-
- If you are on OIT Web Hosting, you should store your backup in the "private" folder like so:
-
tar czf ~/private/drupalbackup.tgz *
-
- If you are using SSH, you can navigate to your site's base directory and issue the following command:
- Backup your MySQL database. On OIT Web Hosting, the easiest way to do this is to log into the Plesk Control Panel for you site and access phpMyAdmin via the Webadmin link in the Databases management section. On the other hand, if you are on a stand-alone web server where you have direct access to mySQL commands, you can run a command like the following (be sure to insert the correct username, password, and database name for your particular website):
-
mysqldump -u USERNAME -p DATABASENAME > ~/backups/database-backup.sql
-
- Either via SSH/SFTP or (for sites on OIT Web Hosting) the Plesk Control Panel File Manager, locate the existing installation of the module and either delete it or move it somewhere outside your Drupal installation's base directory.
- Download the archive file for the new version of the module and unpack it into the same location where the module had previously been installed
- Via SSH, a typical set of commands for steps #6 and #7 might look like this:
-
cd /path-to-your-drupal-site/sites/all/modules
-
rm -r modulename
-
wget https://drupal.org/files/projects/module-x.y.tar.gz
-
tar -xzvf module-x.y.tar.gz
-
- Return to your web browser and navigate to https://yourSiteHostName/update.php. Follow the prompts to apply any database table updates that are needed.
- Check the administrative Status report to verify that everything is working as expected.
- Navigate to the Maintenance subsection of the Development section of your site's Configuration administration area (Configuration -> Development -> Maintenance) and disable the "Put site into maintenance mode" checkbox. (Don't forget to save your change!)
Updating Drupal 10 Core and Modules
Updating Drupal 10 Core and ModulesMost Drupal 10 installations on campus will be hosted on OIT Web Hosting and managed through composer (not Installatron as was used for Drupal 7 and earlier). Updating Drupal 10 under composer is relatively straightforward, but does involve several steps:
- For good measure, open the site in a web browser window, log in, and put the site in maintenance mode. Leave this window open so that you can return to it as needed.
- In a separate browser tab/window, log into the site's Plesk Control Panel through OIT Web Hosting.
- While all OIT Hosting Accounts now have automatic updates enabled, it doesn't hurt to run a full manual backup to capture the most recent changes, just in case something goes wrong while updating.
- Go to the Backup & Restore button in the right-hand sidebar on your site's Plesk control panel
- Select the Backup button and follow the prompts
- With your backup complete, go to the PHP Composer tool in your site's Plesk Control Panel
- Under Package Dependencies you should see an Update button. Select this button.
- You should get a pop-up modal showing the update progress. This may take a little while, so please be patient.
- When the updates are finished, return to your first browser window (the one that is logged into your Drupal site) and select the Drupal icon in the administrative toolbar for your site, then select Run updates to run database schema updates.
- If you have any trouble here, you can try going to the URL path of your site's home page with "/updates.php" added to the end of the URL.
- When the database schema updates are complete, test your site and make sure it still functions as expected.
- Disable maintenance mode to make the site open to the public again.
Upgrading to Drupal 10 from Drupal 9
Upgrading to Drupal 10 from Drupal 9The following information is currently targeted to those site admins who have a site built on a custom theme implementation or have written custom modules for Drupal 9.
If you are using the standard Drupal 9 Drupal Express provided by Institute Communications, you should wait until they release a new version of the Georgia Tech theme package before trying to upgrade to Drupal 10.
A list of things to be watchful for when upgrading to Drupal 10 (to be expanded in the near future):
-
There's a new 2.x version CAS module and 2.x version External Auth module that must be installed before upgrading.
-
For that matter, use the Available Updates report to scrutinize all of your modules, even the ones that show up in green. A module with a major version update can still render in green if you have the last release of the previous major version.
-
If you are running a Composer manged site, install the Upgrade Status module to check your site for upgrade issues that need to be corrected.
-
If you have your own custom modules, you'll need to go through all of them and check for Drupal 10 compatibility issues:
-
drupal_get_path() and drupal_get_filename() are removed from Drupal 10
-
\Drupal::entityQuery now requires an accessCheck() parameter to work
-
The themes Seven, Classy and Stable have been removed from Drupal 10 and need to be disabled before upgrading, unless you plan to use the contrib versions, in which case you must install those versions before upgrading.
-
The administration theme of choice is now 'Claro' - you should switch to Claro and uninstall Seven before trying to do an upgrade to Drupal 10.
-
NOTE: If a theme you are using has enabled Classy or Stable, you must use a hack to disable them, as they are hidden in the admin GUI by default. See Drupal Issue #3328016 for more details.
-
Short summary: If a theme uses another theme as a base theme, the other theme gets enabled at install time. However, Classy and Stable are hidden themes, so they don't show up in the admin GUI, thus you can't uninstall them through the GUI. Unfortunately, Drupal 10's update.php script expects them to be uninstalled. The hack involves modifying both theme's
.info.yamlfiles to unhide them, allowing you to uninstall them. Take note that even after unhiding a theme, you still won't be able to uninstall it if an active theme refers to it as a base theme. Deal with those active themes first (uninstall them or update them to not rely on Classy or Stable), then flush caches and you should be able to uninstall Classy and Stable after unhiding them.
-
-
If you are using a theme based on Classy, you have two choices: install the contrib version of Classy, or merge everything from Classy into your theme. Do note that Classy uses Stable as a base, and Stable has also been removed from Drupal 10, replaced with Stable9. Stable9 does exist in Drupal 9.5.0, so you can port your theme over while still running under Drupal 9. However, you'll have to use the hack in the previous bullet point to enable Stable9 before you can get another theme to use it as a base theme. This is because Stable9 is also hidden, like Stable and Classy
-
-
Last but certainly not least, update the core_version_requirement setting in each custom theme and module's
.info.ymlfile to include ^10
-
-
Deprecated Modules: The following need to be fully uninstalled before upgrading, unless you are choosing to use the new contrib versions, in which case you need to install the corresponding contrib version before upgrading:
- CKEditor 4 (if you're removing it, don't forget to remove all CKEditor 4 add-on modules as well)
- Color
- Quickedit
- RDF
- Aggregator
- Hal
Migrating to Drupal 10 from Drupal 7
Migrating to Drupal 10 from Drupal 7Migration, not upgrade
Drupal 8, released in November of 2015, was a major rewrite of the underlying Drupal code (Drupal's core engine and APIs). Because of the multitude of changes, there is no direct in-place upgrade path to go from any earlier version of Drupal to Drupal 8 or later. Instead, Drupal 7 and earlier sites must be migrated to Drupal 8 or later, which involves setting up a whole new Drupal 8 website and copying into it (manually or automatically) the content of the older website.
All Drupal 7 sites that are to remain on Drupal should be migrated to Drupal 10, the latest version of Drupal.
Requirements and Web Hosting Support
Drupal 10 requires a hosting environment running at least PHP 7.4 or later, which is available on OIT Web Hosting. OIT does not currently support the use of Drush or command line access to Composer. However, the Plesk control panel GUI allows for composer set up and management.
The easiest way to get started with the Georgia Tech branded version of Drupal 10 is to request an installation from OIT. You can select this option when requesting a new OIT Web Hosting account, which is usually the best way to go. In short, you would set up a new site in a new hosting account using a temporary domain name, and then once you have copied over all of your existing content, you would shut down your old site and repoint your real domain name to the new hosting account.
Note
If this sounds a little too technical for you, you should consult with your local IT support staff, who should be able to help you through anything concerning domain names and repointing them.
Georgia Tech Migration Roadmap
Beyond PHP support, each Georgia Tech unit website will need several extra components to be fully usable. The following table is an attempt to start tracking the status of the components needed for Georgia Tech Drupal 9 sites, and it will be updated as releases and additional information come available.
| Component Name | Available for Drupal 10? | Comments? |
|---|---|---|
| Georgia Tech Web Theme | Yes | An official Institute Communications Drupal 9 theme is available. Please see the Georgia Tech Web Theme section for more information on the status of Drupal 10 theme development. |
| GT Account Authentication | Yes | CAS module v1.0 is fully usable and CAS configuration instructions are available. |
| Mercury News and Events | Yes | An official port of the official Hg Mercury is available. It uses a feeds approach (creating nodes for each news or event item) that is different from the Drupal 7 module approach. Testing in a development environment is recommended to gain familiarity with how to configure and manage the Drupal 10 module. |
| GT Content Types | No | Vertical, Horizontal, and Multipurpose page types are not going to be ported to Drupal 8. Such pages will have to be rebuilt in Drupal 8+. Alternative page layout systems include:
|
| GT Drupal Express (DX) | No | A Drupal 10 installation is available for Drupal 10 websites installed through OIT Web Hosting - GT Drupal Express (DX) for Drupal 9. Please note that this is not be a direct replacement (or direct upgrade path) for existing Drupal 7 DX sites. Drupal 7 DX developers should plan for a manual content migration to Drupal 10, as it is unlikely that a script will be developed to aid DX migrations to Drupal 10. A Drupal Express migration strategy guide is under development. |
| Web Forms | Yes | The traditional Webform module was been completely rewritten for Drupal 8 and is much more capable (and more complex) than the old version. Existing users should treat it like a new product and go through all available getting started and training guides and videos before trying to build a form with Drupal 10. Drupal 9 itself comes with a limited Contact Form functionality and a handful of contrib modules (such as Contact Storage) are available to extend that functionality, though not to the level found in the traditional Webform module. Contact forms are recommended for simple RSVP and feedback forms. |
Complete Migration Process
Kevin Pittman has posted a guide to migrating from Drupal 7 to Drupal 10 that includes a lot of planning tips and technical details.
Drupal Express (DX) to Drupal 10 Upgrade/Migration Strategies
Drupal Express (DX) to Drupal 10 Upgrade/Migration StrategiesMany Georgia Tech websites have been built using Drupal Express (DX), which is a custom version of Drupal that allows you to create a website with little technical or design expertise. The ready-made site comes with built in features and tools like news and events listings, and mobile optimization. The Office of Information Technology offers Drupal Express as an option when requesting a new web hosting account. Selecting this option causes Drupal Express to be pre-installed in the account so that the unit can start using the site almost immediately without having to do any technical work on the back end of the site.
In spite of the continued use of the name, there is very little technical similarity between Drupal Express for Drupal 7 (we'll call this Drupal 7 Express) and the current Drupal Express for Drupal 10 (we'll call this Drupal 10 Express). If you are running a Drupal 7 Express site, you will need to completely rebuild your site in Drupal 10 or another content management system. This is a good time to assess your site and determine if it might be a better fit for something like Sites@Georgia Tech - OIT's article "Is Drupal the right choice of CMS for my site?" goes into some of the pros and cons of both Drupal 10 and Sites@Georgia Tech.
If you choose to move forward to Drupal 10, the following guidelines and tips will help you plan for a manual site migration from Drupal 7 Express to Drupal 10 Express:
- Vertical, Horizontal, and Multipurpose page types are not going to be ported to Drupal 10 and will not be copied over by the Drupal Migrate tool. Such pages will have to be completely rebuilt in Drupal 10 using the new layout system called Layout Builder.
- Drupal 7 Express sites may still benefit from using the Drupal Migrate tool to at least bring over their Basic Page content. Bear in mind that some amount of clean-up will be necessary after using Migrate, but the clean-up may be easier than cutting and pasting a lot of Basic pages into your new site.
Kevin Pittman has posted a detailed Drupal Migration guide that describes how to use the Migrate tool. (The guide is labeled for migrating to Drupal 8, but the concepts still apply when migrating from Drupal 7 to Drupal 10.)
- Other components included in Drupal Express may not be available for Drupal 10 or may have been superseded by new components. A breakdown of known Drupal Express components and their status is posted below.
In case you are enlisting the help of someone with technical developer skills who would like to know more about the make-up of Drupal Express and what to expect when migrating a Drupal Express site to Drupal 10, below is the full list of components included in Drupal Express (excluding minor ones no longer needed in Drupal 8+) and their known Drupal 10 status.
Please note that just because a module has a production version, this does not mean that it works the same as it did in Drupal 7 or that it supports all of the features in the Drupal 7 version. Please read the documentation for each module to see what has changed.
| Component Name | Available for Drupal 10? | Comments? |
|---|---|---|
| Georgia Tech Web Theme | Yes | An official Institute Communications Drupal 10 theme is available. |
| GT Superblocks | No | No port planned or expected of this custom module |
| GT Editor | No | No port planned or expected of this custom module, but the built-in CKEditor provides much of the same functionality and can be customized as needed |
| GT Login | No | No port planned or expected of this custom module, but the CAS module is part of Drupal 10 Express and provides GT Account Username based authentication. CAS configuration instructions are available. |
| GT Tools | Yes | The official Drupal 10 Georgia Tech theme has it's own required "GT Tools" module that provides support for some of the theme's features. |
| HG Reader | Yes | An official port of the official Hg Mercury is available. It uses a feeds approach (creating nodes for each news or event item) that is different from the Drupal 7 module approach. Testing in a development environment is recommended to gain familiarity with how to configure and manage the Drupal 10 module. |
| JWFilter | Superseded | JWFilter was for the old OIT DMI media repository that is no longer available. Please use the Ivan Allen College's Support for oEmbed module for embedding videos from the new Georgia Tech MediaSpace repository |
| Component Name | Available for Drupal 10? | Comments? |
|---|---|---|
| Admin Menu | Superseded | Use Admin Toolbar |
| Admin Views | In Drupal 8+ Core | |
| Block Reference | Superseded | Use the built in Entity Reference field |
| CKEditor | In Drupal 8+ Core | |
| CTools | Production | Not required by any previous Drupal Express modules in Drupal 8 |
| Custom Search | Beta | From the Custom Search project page: "The 8.x-1.0-beta branch is usable, and instead of overriding the default search block like it did with D6/7, it provides its own block(s)". Not recommended for use (not being updated by maintainer) |
| Date | In Drupal 8+ Core | |
| Diff | Production | See the Diff project page |
| Field Group | Production | See the Field Group project page |
| Google Analytics | Production | See the Google Analytics project page |
| IMCE | Production | See the IMCE project page |
| IMCE MkDir | Superseded | Now part of the main IMCE module |
| Libraries | Development | Not required by any Drupal 10 Express modules |
| Link | In Drupal 8+ Core | |
| LinkIt | Production | See the LinkIt project page |
| Menu Block | Production | See the Menu Block project page |
| Module Filter | Production | See the Module Filter project page |
| Nodeblock | Superseded | "Node" blocks can be created in Drupal 8+ by creating a custom block type and adding an Entity Reference field configured to reference node content |
| Override Node Options | Production | See the Override Node Options project page |
| Pathauto | Production | See the Pathauto project page |
| Pathologic | No | |
| Revisioning | In Drupal 8+ Core | Replaced by the combination of Workflows and Content Moderation. |
| Token | Production | See the Token project page |
| Transliteration | No | A filename transliteration patch for Drupal 8+ core is available if you want to have filenames transliterated, but that patch hasn't been committed to production core yet. It has been rolled into a Transliteration Filenames module. |
| Video Embed Field | Production | See the Video Embed Field project page |
| View Unpublished | Production | See the View Unpublished project page |
| Views | In Drupal 8+ Core | Existing views do not migrate to Drupal 8+, but can be recreated by hand |
| Views Bulk Operations | Production | See the Views Bulk Operations project page |
| WYSIWYG Filter | In Drupal 8+ Core |
Upgrading to Drupal 9 from Drupal 8
Upgrading to Drupal 9 from Drupal 8Notes, tips, and tricks for upgrading a Drupal 8 site to Drupal 9
Moving to Drupal 9 from Drupal 8 does not involve near as much planning and preparation work as previous major version upgrades thanks to changes the Drupal organization has made to the development process. Instead of Drupal 9 introducing a new batch of features, new features have been added gradually over the major point releases of Drupal 8. The key changes with the first release of Drupal 9 will be to remove deprecated (old and no longer used) code, and to upgrade the underlying Symfony framework. On the surface, though, you should not see any notable differences between Drupal 8.9 and Drupal 9.0, assuming you have prepared your site properly.
Preparation
Basic Requirements
-
Drupal 9 requires PHP 7.3 or higher (7.4 is preferred). If you are on OIT Web Hosting, you should be able to set your PHP version now via your site's Plesk Control Panel.
- Drupal 9 requires a settings.php change:
- The line beginning with "
$config_directories['sync'] =" has to be changed to "$settings['config_sync_directory'] =" -
Note: You can do this before upgrading, as Drupal 8.9 will work with either version of the setting.
- The line beginning with "
- To upgrade to Drupal 9, you must be on Drupal 8.9.0 or higher.
- If you are already on 8.9, make sure you have the latest patch release to get the smoothest transition
-
If you are on anything earlier, upgrade to the latest patch release of 8.9 first, then upgrade to the latest 9.0 release.
- Drupal 9 requires all active themes and modules to declare Drupal 9 compatibility:
- Compatibility is indicated by a line in the theme or module's .info.yml file that starts with "
core_version_requirement:" - Check and update all custom and contrib modules.
- Compatibility is indicated by a line in the theme or module's .info.yml file that starts with "
- Drupal 9 (as did Drupal 8.9) uses CKEditor 4.14.0, but Drupal 9 seems to be stricter about CKEditor plugins. If you are using any add-on CKEditor plugins, check each one to see if there's a 4.14 specific version and upgrade as needed. Composer should maintain the compatible plugin version with a Drupal 9-compatible release.
As an example, Balloon Panel, used by Accessibility Checker, was one that needs to be up-to-date to work in Drupal 9.
Checking Module / Theme Compatibility
There are several tools available that are supposed to check your site's modules and themes for Drupal 9 compatibility. The present options either require the ability to run PHP at the command line or require your site to be managed through Composer (such as Drupal Express websites).
Upgrade Status Module
The Upgrade Status module can perform a website audit to determine which modules, themes, and add-ons are Drupal 9 compatible.
Command Line
If you are comfortable with running simple commands at the Linux command line, you can get a quick overview of your modules declared compatibility by going to the main modules directory and running the following command:
grep "core" */*info*
For any module where you do not see a line with "^9" near the end, you'll need to do some testing and research to see if the module will work with Drupal 9. Check first for a new major version release, and if there is none, you could try the instructions given below for testing a previously Untested Release to see if it causes any problems.
Process
Once you've completed all of the preparatory steps, upgrading is the same as if you were upgrading to another point release of Drupal 8.
As with any major update, make a full backup (filesystem and database) before you begin, just to be safe.
Afterward, test major website capabilities thoroughly, since a lot of old code has been removed and the underlying Symfony engine has received a major upgrade.
Institute Communications update process
Refer to Institute Communications' gt_installer Drupal 8 to Drupal 9 update process to update GT Theme, GT Tools, and GT Profile to their latest versions.
Issues
Semantic Numbering - New Major Releases
As more time goes by, more module developers will move to the new semantic numbering system that is not tied to a Drupal version number (e.g. 7.x-1.0). Typically, if a module was at say version "8.x-3.5" then the next major release done under the new numbering system would be "4.0.0". You'll have to check carefully for this change, as Drupal alerts major version releases (8.x-3.5 to 4.0, for example) as "Other versions available".
However, in the case of modules like Webform, you may find you are expected to upgrade to the next major version when you upgrade your site to Drupal 9. Module version updates to the next major version can be done easily if you manage your site with Composer. Otherwise, you'll have to do this by hand at the filesystem level (Drupal won't upgrade to a new major version via the GUI).
As with most major version upgrades, manually run schema updates (go to update.php after updating).
Known Problem Modules
-
Devel has a new 4.0.0 release just for Drupal 9, but the popular Kint debugger sub-module is gone from 4.0.x. To get that functionality you have to use composer to install a Kint plugin for Devel 4.0.x or use the devel_kint_extras module. That's a big complication if your site is not set up to be managed by composer. As a workaround, you can download the PHAR version of Kint and manually include it in your site to get its functionality. Please note that the manual library process is not as streamlined an install as a prepackaged module.
-
Webform 8.x-5 is not compatible with Drupal 9 at all and will actually break the update.php process. If you use Webform, do not attempt to upgrade to Drupal 9 until you have upgraded Webform to its new 6.0 release.
Using composer to upgrade to Drupal 9
Using composer to upgrade to Drupal 9Drupal 8.9.x websites managed with Composer can be updated to Drupal 9.x by following the steps below.
Before updating
Follow the directives on the Upgrading to Drupal 9 page:
- Drupal 9 requires a settings.php change.
As with any major update, make a full backup (filesystem and database) before you begin.
Institute Communications update process
Institute Communications has provided an update script to assist with this upgrade. Refer to Institute Communications' gt_installer Drupal 8 to Drupal 9 update process to update GT Theme, GT Tools, and GT Profile to their latest versions.
Upgrade Process
1. Install Upgrade Status and read the report
Install Upgrade Status like you would any other module:
composer require drupal/upgrade_status
drush en upgrade_status
drush cr
After enabling the module and clearing caches, navigate to Reports > Upgrade Status (admin/reports/upgrade-status). On the Upgrade Status page, make a note of the Remove and Update sections.
Remove shows uninstalled modules and themes that are not compatible. You can remove each project using:
composer remove drupal/PROJECTNAME
Update shows each project which needs a Drupal 9-compatible release. For each project, go to the Issues (or the associated Drupal.org module page) and make a note of what version is required for Drupal 9 compatibility.
2. Upgrade Drupal modules/themes to 9.x-compatible releases
Using the knowledge from Upgrade Status' Update list above, upgrade each module to its recommended Drupal 8 and Drupal 9 release:
composer require drupal/imageapi_optimize:^4.0
If you are unsure of how to write the composer require statement, each project release (e.g. drupal/imageapi_optimize:^4.0) has an Install with Composer text snippet to copy and paste.
Repeat this for each project that needs a new version for Drupal 9 support. Then, upgrade the database on your Drupal website by going to {website}/update.php.
Note for Drupal 9-only releases
Most modules, including all dependencies of the Drupal 8 Drupal Express install, have releases that are compatible with both Drupal 8 and Drupal 9:
- Drupal.org module project download pages (e.g. faqfield:7.0) show compatibility with both versions with
Requires Drupal: ^8 || ^9
However, there are release that require just Drupal 9. For those modules (such as permissions_by_term:3.0), you will need to upgrade them while upgrading to Drupal 9.x.
3. Upgrade Drupal core to 9.x
From the drupal.org docs:
composer require drupal/core-recommended:^9.0.0 drupal/core-composer-scaffold:^9.0.0 drupal/core-project-message:^9.0.0 --update-with-dependencies --no-update
Please note the argument --no-update, which:
We use --no-update to avoid a chicken-and-egg problem with mutual dependencies.
--no-update
4. Commence upgrade!
Think you've updated all your modules and themes, and can begin the Drupal Core update to Drupal 9? Begin the update:
composer update
Make a note of any composer error message during this process.
5. Update Drupal
Now, run the database updates.
If things broke
If composer goes haywire and you find yourself in purgatory, replace the composer.json with your pre-upgrade backup version, and delete the composer.lock file. Then, force composer to recheck and reinstall modules back to their old versions with:
composer install
Version Agnostic Migration Resources
Version Agnostic Migration ResourcesDownloading a Site Backup File From OIT Web Hosting
Downloading a Site Backup File From OIT Web HostingDownload an OIT Web Hosting Backup File
Log into your Web Hosting account's Plesk Control Panel and select the Backup Manager option on the right-hand side of the main page.
On the Backup Manager page, you will see all of your existing site backups. If you have not configured automatic backups and have never run a manual backup, then you won't have anything to download. In this case, you can select the Back Up option and follow the prompt to initial a backup of your site. Do note that this is done in the background and may take a while on bigger sites, so start it before you go to lunch, and hopefully it will be done by the time you get back to your office.
Locate the backup that you want to down load and select the green down arrow icon on the far right of the backup's entry (see screenshot below).
![]()
Your backup will download to your computer, and have a name similar to this:
backup_mysite.gatech.edu_info_1503101033.xml.tar
Uncompress a Downloaded Backup File
You will need a special program to unarchive a backup file, as backups are provided in the TAR format.
- On a Macintosh, you may be able to double-click the file and get Mac OS X to unpack it for you - your mileage may vary depending on your version of Mac OS X and how large the backup file is. You can always go to the command line and unpack the file as well (see the Linux option below for instructions)
- If you prefer to not use the command line and Mac OS X is giving you trouble, you can try the open-source Unarchiver App
- On Linux or FreeBSD (or Mac OS X), you can unarchive the backup file from the command line like so:
-
tar -xf backup_mysite.gatech.edu_info_1503101033.xml.tar
-
- On Windows, you'll need a utility app that can unarchive a TAR file, such as 7-zip.
What is In a Backup Archive File?
Once you uncompress your backup file, you will have a directory with the same name as your file, but without the ".xml.tar" at the end. Inside this directory, there are two files you will be working with:
- The SQL backup of your site's database
- The file system of your Drupal site
File System
The files for your site will be within a compressed file that has "user-data" in its name, like this:
backup_mysite.gatech.edu_user-data_1503101033.tgz
Uncompress this file into a folder of the same name (without .tgz on the end), then look inside it for a folder named "httpdocs", like this:
backup_mysite.gatech.edu_user-data_1503101033/httpdocs
This folder is where your Drupal site files live. You can review them, copy them to a development web server on your local computer, or archive just that section of the file system in order to transport them to another computer.
Change settings.php Immediately
If you are going to try to use this backup to create a development copy of your live website, immediately change the database connection information so that you don't accidentally connect to your live site. Look for your Drupal settings file at:
backup_mysite.gatech.edu_user-data_1503101033/httpdocs/sites/default/settings.php
Database
The SQL for your database will be under a folder called "databases" and then another folder with the same name as your database, like this:
databases/database-name/backup_database-name_1_1503101033.tgz
Rename Your Database in SQL
First, uncompress this file.
If you want to edit the SQL, you should use a very basic text editor (such as Notepad on Windows or TextEdit on mac) because it is a LARGE file and may overwhelm fancier programs.
The main recommended edit is to remove the actual name of the database from the line near the top. This prevents conflicts when importing your SQL into an empty database with a different name.
Redirection and Checking for Broken Links
Redirection and Checking for Broken LinksA Redirect module is available for Drupal to help manage link redirects and locate problem areas on your site post-migration.
Installation
To install, follow the directions below:
- Download the Redirect module
- Upload the module to your /sites/all/modules/ folder, or use the Upload New Module administration page.
- Install and enable the module.
Usage
The interface for the Redirect can be found under Configuration -> Search and Metadata -> URL redirects, or by navigating to /admin/config/search/redirect.
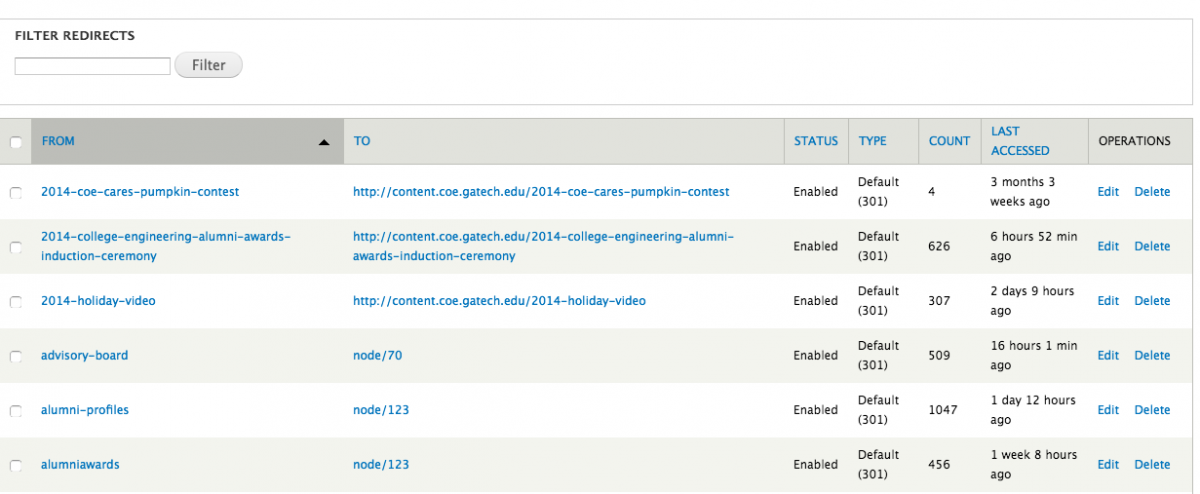
On the overview page, a listing of your existing redirects are in place. Drupal tracks each redirect, their status, the type of redirect, and how often they're accessed.
Finding and Fixing Dead Links
You can also use the Fix 404 Pages, located at /admin/config/search/redirect/404 or as a sub-tab off of the URL Redirects page.
This page allows you to identify currently-broken links on your site and a quick way to create a redirect.
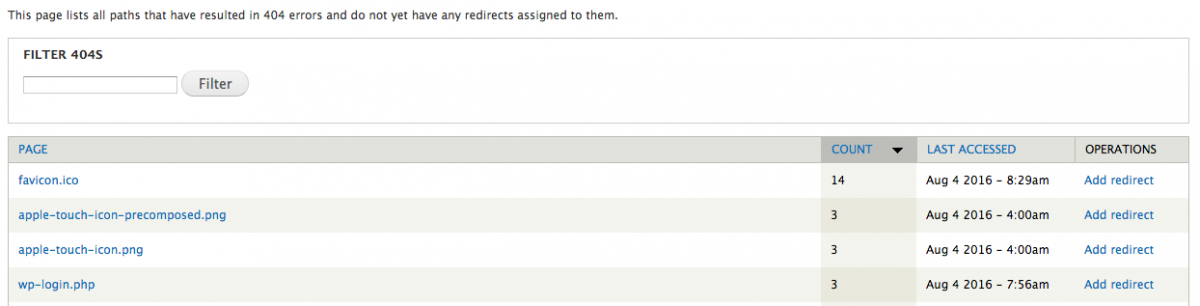
Leverage your local web developer (or contact the Georgia Tech Drupal mailing list) to see if a page or link needs to be redirected.
In the example above, wp-admin.php is a WordPress (another content management system) login page and is routinely used by bots and hackers to attempt to infiltrate your website. Because we're running Drupal, we can ignore most all of those pages.
To add a redirect to one of these 404'd pages, select the Add Redirect link to the right.
Redirect Options
When creating a redirect, the form should look similar to below.
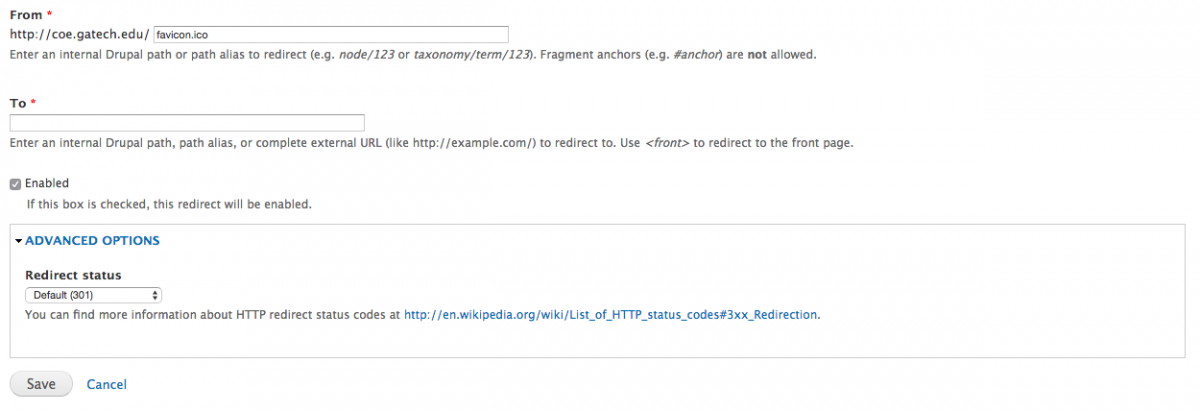
All that is needed to complete a redirect is completing the To, or where the page needs to go when redirected.
Under Advanced Options, the redirect status can help search engines and browsers interpret the link. The Redirect module provides some short description by each one to give an idea of what each does.
Unless otherwise noted, 301 Moved Permanently or Default (301) should always be used.
If you think you have a use case for any of the other redirect types, please contact a web developer on-campus. Improper usage of the redirect type may hurt access to your redirected page by search engines.